Frankie Wrap Skirt by Made Label

This must be the first sewing pattern that came to me rather than the other way around. I saw an ad in my Instagram stories for the free Frankie Wrap Skirt pattern from a new pattern designer, Made Label. This pattern came to me at just the right time. I had a few metres of satin that my brother and his wife bought for me on holiday and was waiting for some inspiration to use it. I had originally thought I might make a summer dress but when I saw this pattern, I knew it was the one! I already have a ready-to-wear wrap skirt that I love and had wanted another one so it was perfect timing.

I had just enough fabric for the pattern and since it didn’t come with a cutting layout, I spent a long time carefully considering how to lay the pattern pieces to ensure I didn’t run out of fabric. Some of the pieces needed to be cut out quite a few times, especially the frill sections, which made it somewhat complicated. To conserve fabric, I decided not to cut the pieces that needed to be cut twice on folded fabric but instead, to lay them out twice. You would think after all of this careful consideration, I wouldn’t have made such an obvious mistake… until I did!

After cutting all of the pieces out and getting ready to sew the sides together, I realised I had cut two of the side panels facing the same direction rather than mirroring each other. I didn’t have enough spare fabric to re-cut this piece and to make things worse, the fabric came from Myanmar so buying more was extremely unlikely. I had to innovate to make the skirt work. I did briefly consider just turning it into a short skirt but decided instead to take advantage of the fact that one panel would wrap over the other. I ended up retracing the piece using part of one of the already cut pieces and some of the leftover fabric. I then attached the two pieces with a French seam and used it as the panel that sits under the wrap-front of the skirt. Thankfully, you can’t see it when the skirt is worn but it was certainly a close shave! This is definitely a reminder that buying a bit of extra fabric is always worthwhile, especially if you can’t easily buy more.

The ‘accident’ (underneath) front panel made up of two pieces sewn with a French seam
The skirt was relatively easy to make and the instructions were simple to follow until I got to the final step of attaching the waistband. These steps are relatively ambiguous and resulted in a lot of head-scratching, Googling and testing on scraps. The third step under ‘sewing the waistband’ says ‘Get your two long pieces and place right sides together. Mark every 2cm with your fabric pen, 5/8 in from the raw edge. ‘ It’s worth noting that this step refers to the short edge, not the long edge. Once you have completed this step and you fold the waistband in half lengthways, you should end up with a hole that will be used later to thread the waistband through.
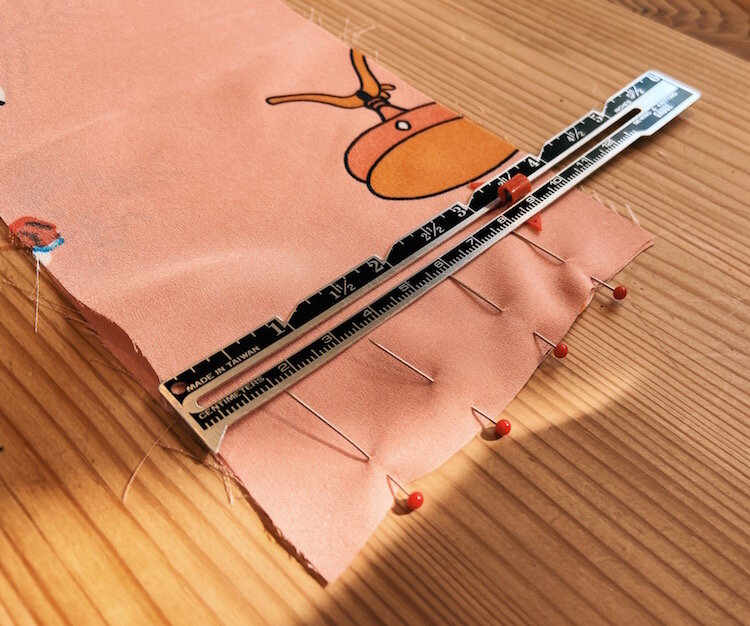
Sewing the hole in the waistband
This pattern is one-size-fits-all. The instructions suggest sewing the ends of the waistband and turning them inside out before the waistband has been attached to the skirt. I recommend attaching the waistband to the skirt first as you won’t know until it’s attached whether the ties are too long, uneven etc. The skirt was otherwise easy to make with beautiful French seams throughout. It’s a great summer make and can just as easily be made into a casual skirt using rayon or even linen.